The Communicate Step: Instructions
Communicating with your Invitees, Registrants, and Attendees is a vital part of successful Event management. EventBuilder provides Organizers with a variety of email templates to select and customize for their Events.

Learn the Communicate step essentials: Communicate Step Overview.
Communicate Options/Instructions
Note: Because emails can be enabled or disabled at either the Template level or Event level, any emails that have been disabled at the Template level will be greyed-out on the screen below. Organizers can reactivate them at the Event's Communicate Step.
A list of available emails with the default delivery timing, as well as 'Test' 'Edit' and 'Send' or 'Resend' options links will be displayed in the Communicate window. There is also an option to insert a confidential disclaimer on all system-generated emails you choose to send.

Confidential Disclaimer
With 'insert confidential disclaimer' selected, the following text will be added to each email sent: "This may contain confidential information and is intended only for the individuals named. Please do not disseminate, distribute or copy this information to unauthorized users. Reasonable and appropriate measures should be taken to protect the data in this communication and any attachments from loss, misuse, and unauthorized access, disclosure, and alteration. Individuals and organizations may not process personal information in a way that is incompatible with the purposes for which it has been collected or subsequently authorized by the individual. Information may be retained in a form identifying or making identifiable to the individual only for as long as it services a purpose for which it was been collected."
Editing/Customizing Emails
Click 'Edit' to open your selected email. The edit window will open:

The Subject line can be personalized but is a required field. {event_title} is a database field that will be automatically inserted upon sending. Organizers can leave the default Event banner (uploaded on the Set Up Step), or they may select 'Browse' to choose a different banner graphic for their email:

From this dialog, Organizers can keep the Banner set on the Set Up page, upload a new Banner, or select a Banner file already available on the Portal. Recommended width: 1400px.
Files larger than 500 MB may need to be compressed to be uploaded successfully. Learn about EventBuilder's file upload recommendations.
If Organizers would like to make any files or presentation materials available in advance of the live event, they may do so under the Attachments section.
Organizers may either:
- Click on the green plus icon ('+') and select the file you wish to attach via the Select File dialog above.
- Best practise: Enter links into email body text to share files
Click 'Save.'
Next, click in the area highlighted below to open the full-featured HTML editor.
Here, Organizers can add additional database fields by selecting 'fx' on the tool bar. There are also options to add text, images, and other elements to further customize this area.
Click in the salutation area to open the editor and customize your signature, add additional fields, and other elements such as logos and certification badges, etc.

At the bottom of the email, Organizers can disable or customize button text.
Button text can be customized on the following emails: Event Invitation, Registration Confirmation, Event Reminder, Event Reminder 2, Attended Event, Missed Event, and Event Rescheduled.
Image Text: All dynamic elements are enabled on this email. If you want to customize these items, disable as appropriate below so you can add them back with your custom formatting.
To disable the buttons, click the circle icon:

When finished editing, click 'Save.' The window will close and return you to main Communicate window.
Send Event Invitation
Organizers can upload a list of Invitees in .csv format and send Event Invitations directly from their EventBuilder portal.
Click on 'Edit' to customize the Event Invitation. When finished, click 'Save.' Next, click on the Send link.

The following dialog will appear:

Click 'Upload List' to open your File Manager. Select the desired .csv file and click 'Open.' The .csv filename will appear in the field shown. The Invitees from your list will appear in the window, where you can verify and/or delete Invitees.
Note: Invitee email addresses are automatically screened for duplicates and skipped if found.

Click 'Send.'
Organizers can upload additional Invitee lists or add individuals separately to this area at anytime.
Note: Organizers must have their invitation recipients' consent to share name and email information prior to distribution.
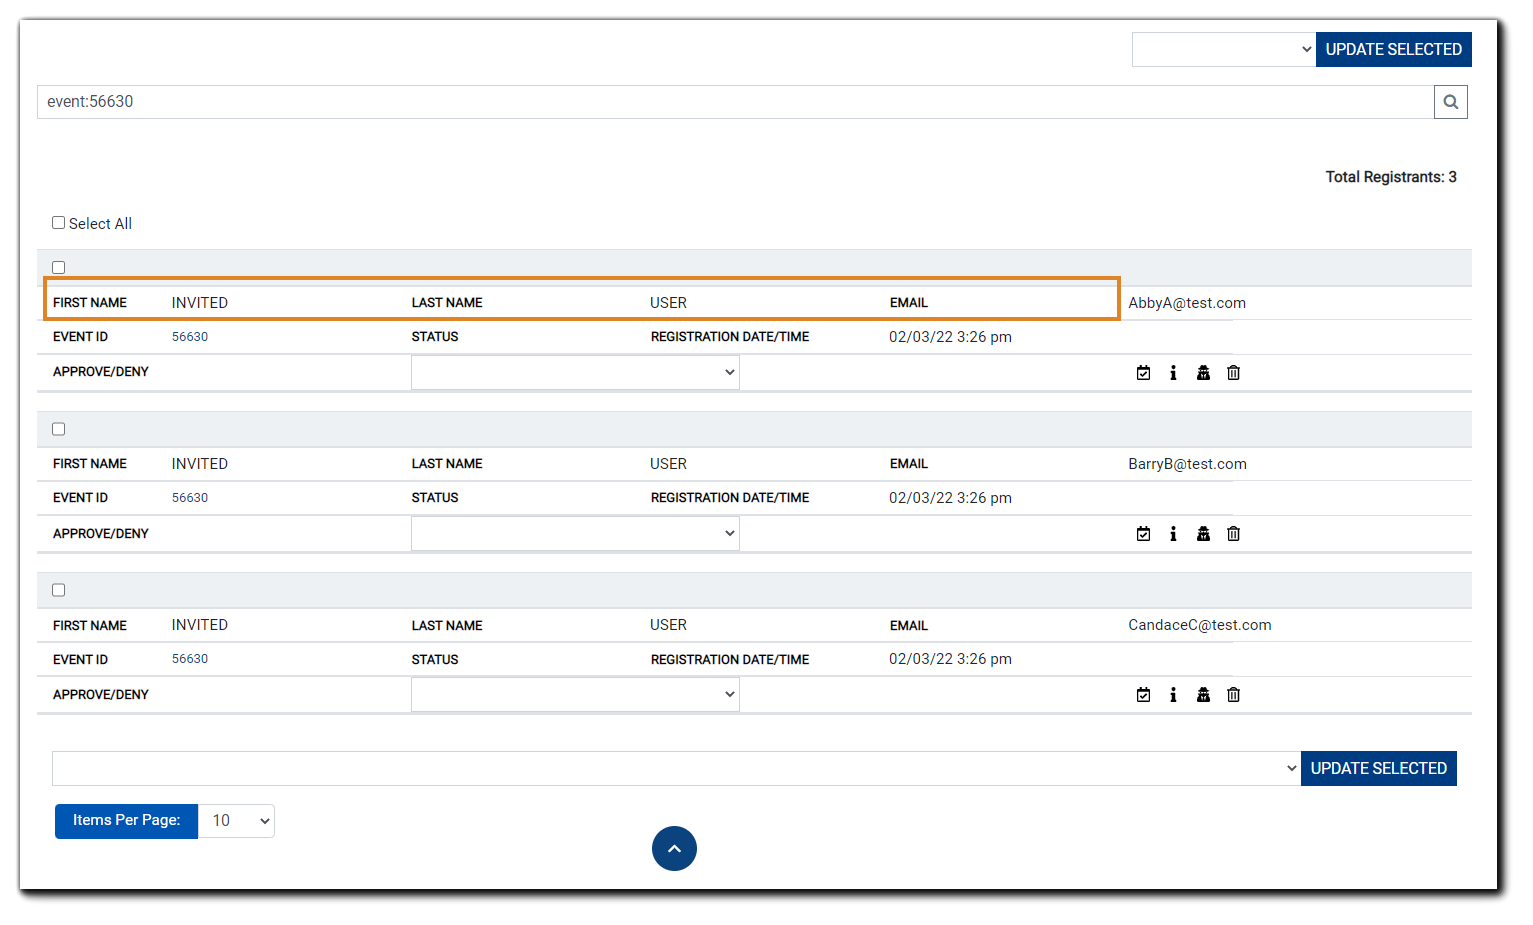
In the Registrant Management area, Invitees who have not responded appear on the list as INVITED USER.

Upon registration, the record is updated to display the Invitee's first and last name, and their status will change to 'Approved.' Other security settings may require additional registrant management. Learn more about Learn more about EventBuilder's Security Options.
Customize Delivery Timing
Organizers can choose the timing of delivery on the following emails:
- Event Reminder
- Event Reminder 2
- Attended Event
- Missed Event
- Event Rescheduled
Navigate to the email you wish to set the delivery schedule for by clicking the 'Edit' link.

Navigate to the bottom of the window and select from the options listed:
Choose Before Event or After Event, select Hour(s) or Day(s) and choose the timing of delivery in the counter field.
Note: Delivery times can be adjusted on the Event Reminder emails unless the time set has passed. i.e., If you have an Event Reminder scheduled to be delivered three days before the Event, you cannot change the delivery day after the email has been sent. You may use the 'Resend' option if needed.
Click 'Save.' The window will close, and your delivery schedule will be set.
Resend Email Options
Enabled emails are automatically distributed on the schedule you have specified. If Organizers need to contact Registrants after the Event’s date/time has passed, the Attended Event and Missed Event emails can be resent.
Note: The Attended/Missed Event emails cannot be edited after-the-fact, only resent.
Click 'Resend' to re-deliver selected email to Registrants.

The email is sent immediately.
On-the-Fly Emails
Organizers can send one-time emails to selected groups of Registrants to communicate specific information.
To create an On-the-Fly email, select 'Edit' from the email list.
The editor window will open and can be customized for the situation. Note that 'Subject' is a required field; the email cannot not be sent without it:

Next, edit the content of your email using the editor provided:
 After completing edits to the email, click 'Save.'
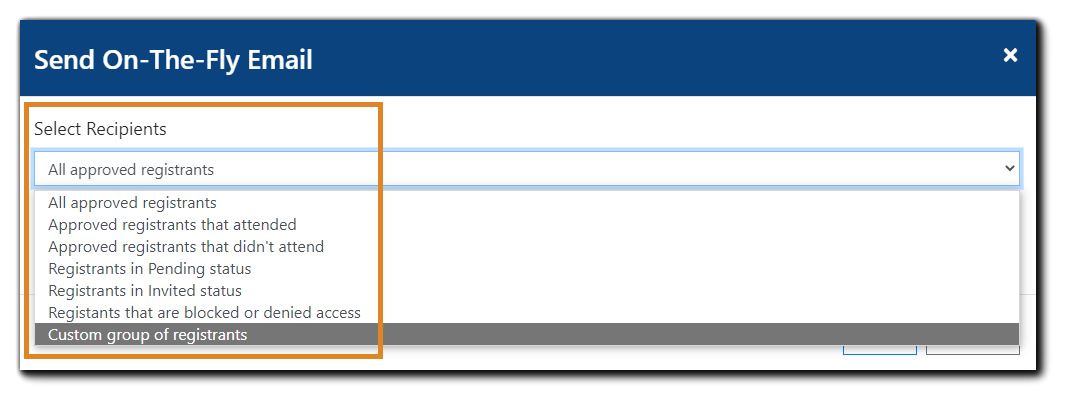
When ready, click the 'Send' link. The 'Select Recipients' drop-down menu will appear. Organizers can then choose their recipient audience from the following:

-
All approved Registrants
-
Approved Registrants that attended
-
Approved Registrants that didn't attend
-
Registrants in Pending status
-
Registrants that are blocked or denied access
-
Custom Group of Recipients
Selecting a Custom Group of Recipients
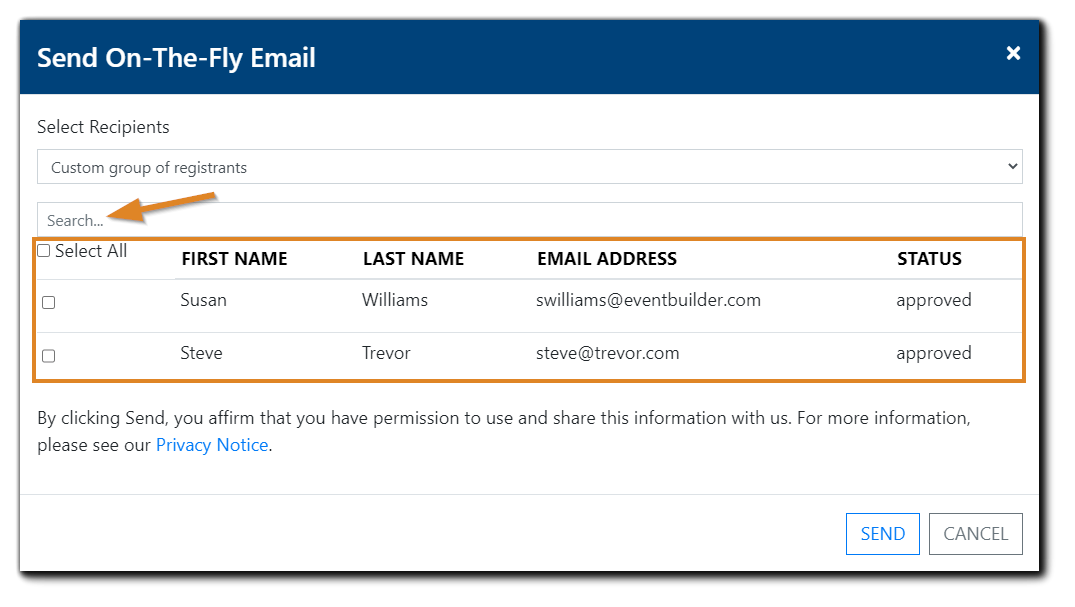
Select 'Custom Group of Recipients' from the dropdown menu. The following will appear:

Here, Organizers can search for specific Registrants, click on any column header to sort, select specific Registrants using the checkbox, or click 'Select All.'
After selecting your desired audience, click 'Send.' The email is distributed immediately.
Enabling/Disabling Emails
Open the email you wish to enable/disable by selecting 'Edit.'

In the upper right corner of the dialog, click on 'email enabled' to disable the selected email. The button will turn grey and read, 'Email Disabled.' To re-enable the email, click on the grey 'email disabled.' Click 'Save' to confirm your choice.
Disabling the Registration Confirmation Email
The Registration Confirmation email contains the unique 'join' link for Registrants, providing access to your Event. If disabled, Registrants will not receive the access link prior to the day/start time of your scheduled Event.
If you wish to continue with disabling the Registration Confirmation email, select 'Enable Email,' the following confirmation dialog will appear:

Image text: 'The Registration Confirmation email includes the Registrant's 'join' link to attend your event. If disabled, Registrants will NOT receive the access link prior to the day/time of your scheduled event.'
Click 'OK' to confirm your selection.
Test
Organizers have the option to send a sample email to the address associated with their Portal User ID to verify content, branding, and any links included, as well as test for successful inbox delivery.
Click 'Test' to initiate the test email. It will be sent to the email address associated with your Portal's User ID immediately.

Calendar Invitation Content
Organizers can customize Event information in the calendar invite (sent as an attachment, 'invite.ics') that Registrants import into their calendars. The invite file contains a Registrant's 'Join' link that delivers them directly to the live Event.
The default Calendar Invitation Copy also includes Event title and the event contact name/contact email. This cannot be edited. Organizers can add additional information and/or database variables by clicking in the text editor below the default copy.

To add additional variables, click on the 'fx' button on the text editor. The following will appear.
 Available Event Variables: Event Title, Event Subtitle, Event Description, Event Banner, Event Dial in Number, Event Dial in Conference ID, Contact First Name, Contact Last Name, Contact Name, Contact Email, Event Date, Event URL, Event ICS URL, Event Certificate URL, Event Certificate Password, Event Console URL.
 Available Registrant Variables: Registrant First Name, Registrant Last Name, Registrant Email, Registrant Dial In PIN, Registrant Event URL, Registrant Survey URL, Registrant Certificate URL.
Select the Event Variables and/or Registrant Variables you wish to include in the calendar invite file. Once variables are selected, Organizers can add additional information via the included text editor.
Opening/Closing Hold Images
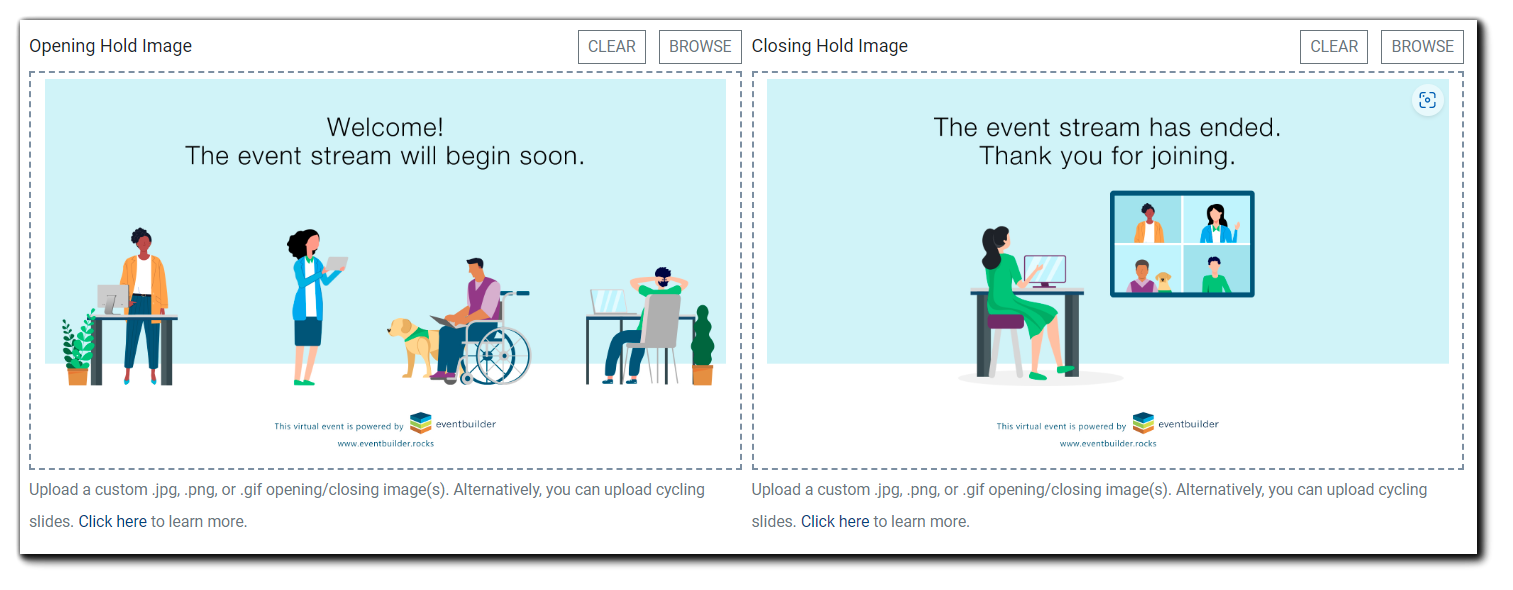
If Streaming Mode is enabled, Organizers can choose .jpeg, .png, or .gif images to be displayed before and after the live Event. Your audience will see the Opening image(s) in the 30 minutes prior to start time, and the Closing image(s) just after your Event ends. Recommended image size: 1920px x 1080px.
 Click 'Browse' to open the file selection window:

You may upload a new graphic file or select an image already on the Portal. Repeat this action for both the Opening and Closing image selection.
To add rotating slides as your opening/closing hold images, see: Adding Rotating Open/Close Slides
Click 'Save & Continue'
Video Training: The Communicate Step
Next - Security Overview


